
Hide your original website address/URL from being displayed – DOMAIN MASKING
How can one redirect a domain without changing the URL? Here is what you’re looking for — Domain Masking. Domain masking allows you to show one URL in the browser’s address bar while another website’s content is shown.
For example: when someone visits your website (for example, a free hosted website that does not allow you to use your own domain name), you can have yourdomain.com (the domain you register elsewhere) shown in the browser’s address bar while loading the website content of yourfreehostingwebsite.com.
WHY DOMAIN MASKING?
There are a few reasons why one wants to redirect his/her website visitors to another website without displaying the destination website address. One of the reasons is when you have an existing website that is hosted free (like a blog from Blogger.com or WordPress.com), and you are not ready to pay for website hosting yet.
In this case, you can just register a new domain name, and set up domain masking so that yourdomain.com will appear on the website address bar on the browser when someone visits your free hosted website.
Here are the steps to mask your Domain Name/URL:
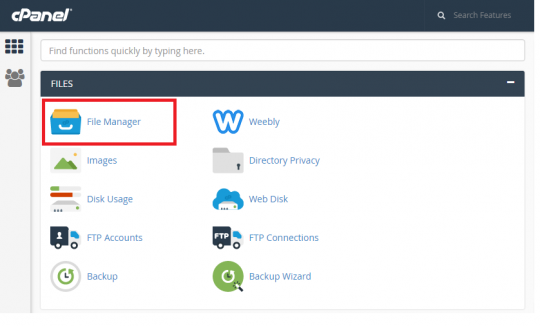
1. Log in to cPanel and look under “File Manager”.
2. Locate “public_html”.

3. Look for the file named “index.html/index.php”. Otherwise, create a new one by Clicking on +File on the upper left.
4. Right click the index.html/index.php file and select edit.

5. You may select and use the “Use Code Editor” to have a better view on code.

6. Edit the Code below and paste to index.php/index/html
Page Title
7. Remember to “Save Change”.
8. Done! Test your www.domain.com Now.
We hope you find this blog post useful. Do let us know if you have any difficulty in following the steps, and we will be glad to provide assistance.
See you in the next post.
Until then, enjoy your weekend!
